Wednesday, November 28, 2012

Dehydrated Apple Slices

I wanted to try my hand at dehydrating, so I decided on apple slices with cinnamon and sugar.

I took out my peeler /corer /slicer. It makes quick work of peeling, coring, and slicing apples uniformly.


Plus the kids love to eat the strings of skin.


Since the peeler/corer/slicer leaves one continuous corkscrew of apple, I take and cut the apple in half and that separates the slices. I put the slices in a bowl and sprinkle cinnamon and sugar over them. I stir to coat all the slices.


Then I just lay them on the dehydrator trays in a single layer. I dehydrated them at 158 degrees for several hours, until they were crispy.


I did two kinds of apples and the granny smith was by far the best of the two. They were absolutely delicious! My kids love apples anyway, but they really liked these.

Some of the pieces broke when I took them off the trays. This worked out great. I crushed them into smaller pieces and used them in our oatmeal packets.


Monday, November 19, 2012

Fruit Leather

Since I had the dehydrator out the other day, I decided to make some fruit leather. This is otherwise known as a fruit roll-up. Did you know you could make you own? You can do it without a dehydrator, too.

First, I took some apple/pear sauce I had canned. I wanted it to be thicker, so I cooked it over the stove for a bit. Then I added some frozen blueberries to it and put it through the blender to mix it well. Then, I put it in a jelly bag and hung it for a bit to remove even more liquid.


Next, I spread the mixture onto my fruit leather sheets that came with the dehydrator. I also spread some on a piece of parchment paper covered with plastic wrap. I turned the oven onto its lowest setting (which is 170). I put the others in the dehydrator at highest setting for a couple of hours until dry.


Then, I just cut them into strips, peeled them off, and put them on wax paper. Finally I rolled up the wax paper and leather. 


I can't wait to make more with other types of fruit.

Try it yourself one of these days!

Friday, November 16, 2012

I'm Smokin' Today!

One of our favorite things to eat is smoked pork loin. Or smoked roast. Or smoked chicken. Or smoked fish. Or smoked ribs. We are smokers, but not in the "black lung" sense of the word.

We bought our Weber smoker a couple of years ago and absolutely love it. The day we smoked this time was a beautiful, sunny day. We were outside working on our pantry project. This meant that we got to smell the aroma of smoking meat all day. There is nothing like that smell!

Mr Farmer went out to start the smoker, while I got the meat ready.


I made a rub for the pork loin and massaged it in. Then I took it out to the waiting smoker.


After placing the meat on the smoker, we put the lid on and walked away.


After a couple of hours, we removde the chicken and ribs. They aren't as thick and are done earlier.


I placed the ribs in the crock pot with some bbq sauce. Then, we ate the chicken for lunch in the form of delicious chicken sandwiches.

Once the pork loin got up to temperature, we took it inside, too. After it cooled for awhile we ran the pork loin through the meat slicer and packaged it up for the freezer. This meat makes perfect sandwiches. I also used some of it cut up and put on our nachos for supper one night.


Wednesday, November 14, 2012

Screen Painting

Part of my pantry project was making a new screen door. I employed several different techniques to make this door unique.

First, Mr Farmer built a fantastic screen door for me. From scratch. And he's never made one before. I want to take a moment and tell you how wonderful my husband is. He is caring, hard-working, and very talented, among so many other good attributes. Some days I wonder what I did to deserve him. (Other days, I wonder what I did to deserve him. But in a totally different way!) Today is one of those first days. I am amazed at how much he can do. Not only did he take my door design and make it. Not only did he build my pantry. BUT! He also helped me arrange the food stuffs inside so it looked good. I love this man!

Here we were fitting the door, so it's unfinished.


Once the construction on the door was done, I began the finishing process. I painted both sides of the door a single coat of dark red. Then, I took a palm sander and sanded it so some of the wood showed again.


I made sure to sand some area more than others. The next step was to stain the entire thing. This darkens the sanded parts to "age" them a bit.

 There are additional steps to antique things, but I liked the look at this point, so I quit at this step.

The next step was something I wanted to try, had never seen before, and had no idea if it would turn out. We installed the screen. Then, I took a full-sheet, clipart print out of a rooster. I fixed it under the screen. I then took a light tan paint and traced the image in paint and filled it in on the screen. I had tried several colors on a scrap piece of screen and decided the tan was the best color as I didn't want the image to be too obvious.


After letting it dry, we took it inside and hung it. Finally, we put a handle on it. I had an antique spoon that I was doing nothing with, so we used that. It could not be more perfect!


And here is the finished door.


What do you think? Did I do the inspiration photo justice? This project took two days, not counting the trip to Menards to purchase the materials. I LOVE the way it turned out!

The Chicken Chick


Monday, November 12, 2012

Pantry

I found this door/pantry on a blog post last week. I knew I had to have it, so I set about searching for antique screen doors. This was a problem because my pantry door is only 24" wide. Apparently most house doors are wider than 24". Go figure. We supersize everything, so we need wider doors.


Because I couldn't find one to fit, I decided to design my own. At this time, I shared with Mr Farmer what my plan was. He wasn't nearly as excited as I was. That's odd. He loves when I add to his list of things to do around the house, especially with projects that aren't necessary. He thought he'd deter me by saying that I had to clean and organize the pantry first. After a discussion about this, I realized I was wrong and needed to do what he said if I wanted a new pantry. That's the way our discussions typically go. He tells me something. I fight and think and fight. Then I realize he is smarter than he looks and much wiser, and I give in and do it his way. It stinks being wrong so often in life! I guess that's the difference between someone who thinks first and speaks second, and me. I come up with all the dreams and ideas and he is stuck trying to execute them.

So, I set to work. I removed everything from inside the pantry and set it on my counters. I can't believe how much stuff was in there! Baby exclaimed, " We look like hoarders, Mom!" She was right.


I threw away 3 garbage bags of stuff. Things I didn't want. Opened bags of stuff. Outdated things. EMPTY boxes put back in the pantry--EMPTY! I also emptied many packages into antique Ball canning jars.

Once everything was put back into the pantry, it looked better, but not great. And I still had no screen door.


I was proud of my work as I showed Mr Farmer the cleaned pantry. I think he thought it would take me weeks to get around to cleaning it out, therefore giving him more time before he had to start the project. HA!

I took measurements of the pantry and the existing door. We made our list of  needed materials. He took a day off of work (not just for this project). We went to Menards on Wednesday evening and bought what we needed.

Can I take a second and tell you how much I LOVE home improvement stores? They are just filled with dreams waiting to be realized. The smell of lumber. Isles of things waiting to be made into something unique. Tools to create. I get giddy just thinking about it.

And now back to our regularly scheduled program.

Thursday morning comes, and we jump out of bed. Wait. That didn't happen. We had our coffee and then got moving. I emptied the pantry again. This time everything fit on our dining room table. We removed the old shelves and scrubbed down the walls.


Then, Mr Farmer went to the shop and made the new shelves. After dry-fitting them, we started to paint the inside of the pantry. The shelves and walls were all done in an antique off-white color.

Next, we went out to the shop and began construction on the screen door. I will describe the door's construction in more detail in a later post.

After all the paint had dried on the shelves, we organized everything.


There are hooks for my mops and broom.
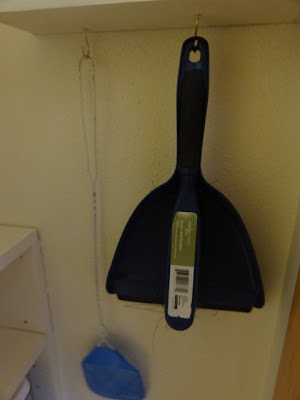
My dustpan and flyswatters have a home now, too.


This is the finished pantry. I LOVE it. It turned out so beautifully!
Now, it should stay this nice if I never have to get groceries again. And the kids never enter the pantry for anything. Ever.


Friday, November 9, 2012

Homemade Oatmeal Packets

Do any of you buy and eat those prepackaged oatmeal packets? My kids eat oatmeal, but like the ease of dumping a packet into a bowl, adding water, and microwaving it. The only thing better to them is if mom makes their oatmeal. Which doesn't happen often.

So, I like to make up little baggies of oatmeal for them. It doesn't take much time and it is so much cheaper than buying the premade ones from the store.

Follow along now as I show you how to make your very own oatmeal packets.

First, assemble your ingredients. I use: oatmeal (not quick oats), sugar, cinnamon, powdered milk, and oat flour. To make oat flour, I put my oats into a blender or baby food maker and blend until powdered.


Next I take a sandwich baggie and add the ingredients and close.

Here is my recipe. Sorta. I vary amounts some.

I sprinkle the cinnamon into the oat flour and mix well.
2/3c oats
1/4c oat flour
1T sugar
1T powdered milk

When you are ready to eat, just add water to cover the mixture in your bowl and stick it into the microwave for 1 minute. I also add in craisins, raisins, apple pieces, or any other bits of yummy that look good to me.


And there you have it. Homemade oatmeal packets.


Wednesday, November 7, 2012

Did You Think To Wash Your Dishwasher?

I read a post the other day and it got me thinking, "Have I ever cleaned my dishwasher?" Of course, I clean the outside, but what about the inside?

I was knocking around in the kitchen anyway, so I decided to give it a wash. It is Sissy's month for dishes, so I had her put away all the clean dishes. Once the dishwasher was cleared out, I took a pint jar and filled it with white vinegar. I placed it on the top shelf and closed the door. I turned the dishwasher to the heaviest load and the hottest temperature settings and turned it on.

Let me tell you, it smelled fantastic when it was done. I hadn't realized there had been any bad odors until it smelled good. The inside sparkled. I took a rag and wiped out any gunk buildup around the edges and on the door. I scrubbed the door itself, inside and out. If you have a trap, make sure to clean it out.


And that's all there was to it. Now I have a clean dishwasher, inside and out. I can rest assured that my dishes are getting their cleanest.

On a side note, I came across some interesting information. I have found that many experts and repairmen recommend that if you have soft water that you absolutely do not want to use gel detergent. It significantly cuts down the life of your machine. Also, if you have soft water, do NOT use a rinse aid. Both of these things will gunk up your dishwasher and cause problems. Use a powdered soap and vinegar. Put vinegar in your rinse aid compartment.

I have hard water, but I still plan to use vinegar and powdered soap from now on.

Now, go clean your dishwasher!